

 0
0Step 1: Reference and Manual Drawing
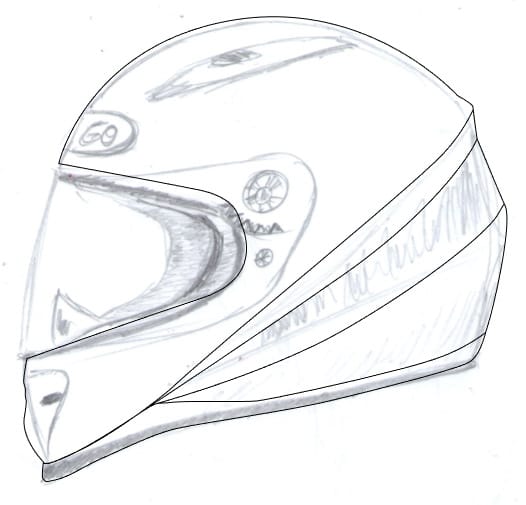
First, we need lots of references to understand the helmet’s shape, proportion, and its reflection. Google Image is a good place to start. You can also search for images from helmet seller in eBay. Take your pencil and paper and then start drawing the helmet shape. Scan the result. We are going to use it as reference inside Illustrator.

Step 2: Drawing Helmet in Vector
We are going to use the scanned image as reference for drawing in Adobe Illustrator. Make new file in Illustrator (Ctrl + N) and then drag the image. From the Layers Panel, click the lock icon to prevent it from accidentally moved. Add new layer on top of the image.


Step 3
Using Pen Tool, start by drawing basic shape of the helmet. You can see that I’m not so strict with the line from the drawing. I add a bit of modification into the shape.

Step 4
We are going to draw the helmet’s rubber on its lower part. To do this, we draw the area, extends outside the helmet.

Step 5
Select the basic helmet shape, duplicate it by clicking Ctrl + C and then Ctrl + F. Select both shape, which are the duplicated helmet shape and the shape we drew earlier, and then select Intersect in The Pathfinder Panels.

Here is the result we have. We are going to use this same technique to draw other shapes.

Step 6
These following shapes are made using the same techniques used earlier.
Step 7
Draw following shape on its mouth area.

Step 8
We need to add gap by adding another slightly bigger shape.

Step 9
Add following to be used as a ventilation hole.

Step 10
Next, draw its visor.

Step 11
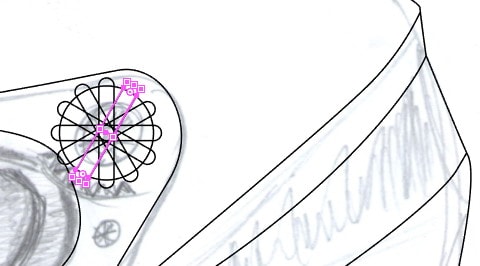
We are going to draw the end part of the visor. Start by drawing a circle and a rectangle on its center. Select the rectangle shape, right click and then select Transform > Rotate. Set its rotation angle to 30° and then click Copy button.

Here’s the duplicated shape.

Step 12
While the shape is still selected, hit Ctrl + D a few times to repeat the transformation process until we have the rectangles in full circle.
Step 13
Select all the rectangles and the circle behind them. From The Pathfinder Panels, click Unite icon to combine all into one shape.


Step 14
We want the shape to be less edgy. Choose Effect > Stylize > Round Corners. Set its Radius to 5 pt and then click OK.

Step 15
Combine the shape to turn it into part of the visor.

Step 16
We are going to draw bolt that attach the visor to the helmet. Draw some circles on the same origin point.

Step 17
Add plus sign made from two rectangles. Put them behind the small circles.


Step 18
Add smaller bolt by duplicating the previous shape and then transform it size.

Step 19
Draw nose cover behind the cover.

Step 20
Use Pen Tool to draw inner padding. I use a bunch of them because I’m planning on breaking them down into several separated shapes.

This is the result when all the shapes is filled with white and stacked in the right place.

Step 21
Let’s add ventilation system on top of the helmet. Start by drawing the following shape.

Step 22
Draw its other side to make it appears three-dimentional.

Step 23
Manually, draw some holes on the shape.

Step 24
Duplicate the basic shape and then place it behind the helmet’s basic shape.


I think this is looking good. We’ll add the detail later in Photoshop.

Step 25: Exporting to Photoshop
Select all the shapes and then hit Ctrl + C to copy them.

Step 26
Open up Photoshop. Make new file. Paste the helmet vector by clicking Ctrl + V. You will have option for pasting metode. If you want to keep as is, just as a vector line in Illustrator, you can choose Smart Object. But, here we want to use the helmet shape as vector paths and shape. Select your shape layer and then click OK

Here’s what we have now. All the vectors are presented as vector paths in a layer shape.

Step 27: Preparing the Layer Shapes
Double click the layer shape and change its color to something vibrant and striking. This will help us to differentiate each part of the helmet easily.

Step 29
Use >strong>Move Tool, the one with black arrow, Select basic shape of the helmet. Move them into new layer by clicking Ctrl + Shift + J. Change its color to new one.

Step 30
Do the same with the other part of the helmet. Each should have different colors. In the image below, the visor’s Opacity is reduced wo we can see the shapes behind it.

Step 31
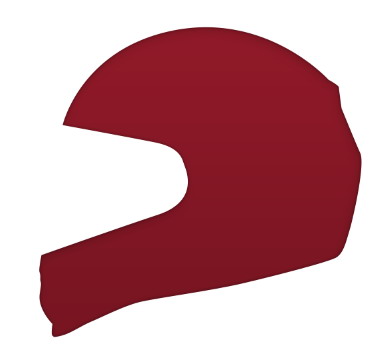
Hide all the shape except for the helmet’s basic shape. The first step to turn a flat shape into three dimentional shape is adding simple light using Layer Style. Double click the layer shape and then add Inner Shadow, Inner Glow, and Gradient Overlay using following setting.


Here’s the result. Not yet realistic but this is a good start.
Step 32
Make new layer above the helmet basic shape and set it into a clipping mask. From now on, everything you put inside this layer will goes inside the helmet. Activate Tool Brush with low Opacity and set foreground color to white. Dab once to add reflection on the helmet surface.

Step 33
Add another relection using same technique used above. This time use bigger Opacity for The Tool Brush.

Step 34
Add another reflection.

Step 35
Add new layer and set it to Clipping Mask too. Select half lower part of the helmet and then add subtle lighting.

Step 36
Using same technique but this time paint with black, add shadow onto the surface.

Step 37
Add layer shape for the helmet’s rubber band at the bottom. We have imported the path earlier from illustrator. You just need to select it and move it to new separated layer shape. Set its color to almost black.

Step 38
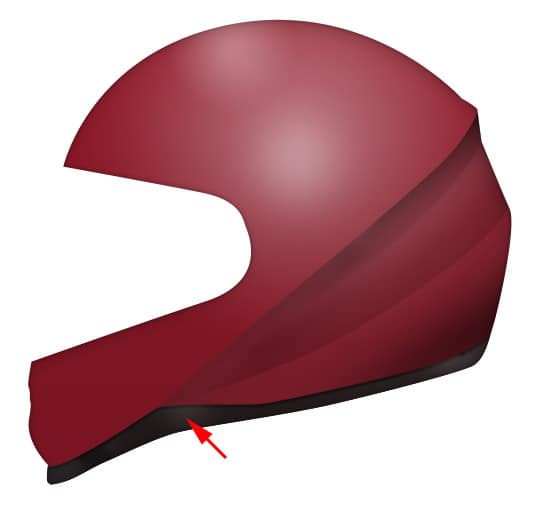
Double click the layer shape to reveal Layer Style dialog box. Add Inner Glow and Gradient Overlay to add shadow into the rubber band.


You can see that there is a thin shadow on upper part of the rubber.

Step 39
Add new layer and set it to Clipping Mask. Dab using The Brush Tool to add subtle lighting onto the surface. Make sure to tone down its Opacity to get subtle result.
Step 40
Add new layer and then manually paint white using The Brush Tool to add stronger highlight on upper part of the rubber.

Step 41
I notice that the surface still seems too flat. So, I decided to add another small highlight onto the surface.

Step 42
Add shape in front of the mouth piece. Use same color as the helmet, red. Add black line to keep it separated from the main helmet shape.

Step 43
Add new layer and then add highlight on the surface.


Step 44
Add another layer and then manually paint sharp highlight using The Brush Tool with white foreground color.

Step 45: Nose Cover
Add nose cover with color grey. Add another layer and then paint white for highlight using The Brush Tool. Make sure to use big Brus


